

Clients who are now friends gave me a gift that enhanced my home life: a mason jar with some of their sourdough starter. I love fresh sourdough bread and they served me a slice of a loaf they had just made at their San Jose farm which was fall-off-the-chair delicious. They also gave me a book “Artisan Sourdough Made Simple” by Emilie Raffa, which you can buy here, which taught me about starter and sourdough bread: https://smile.amazon.com/gp/product/1624144292/
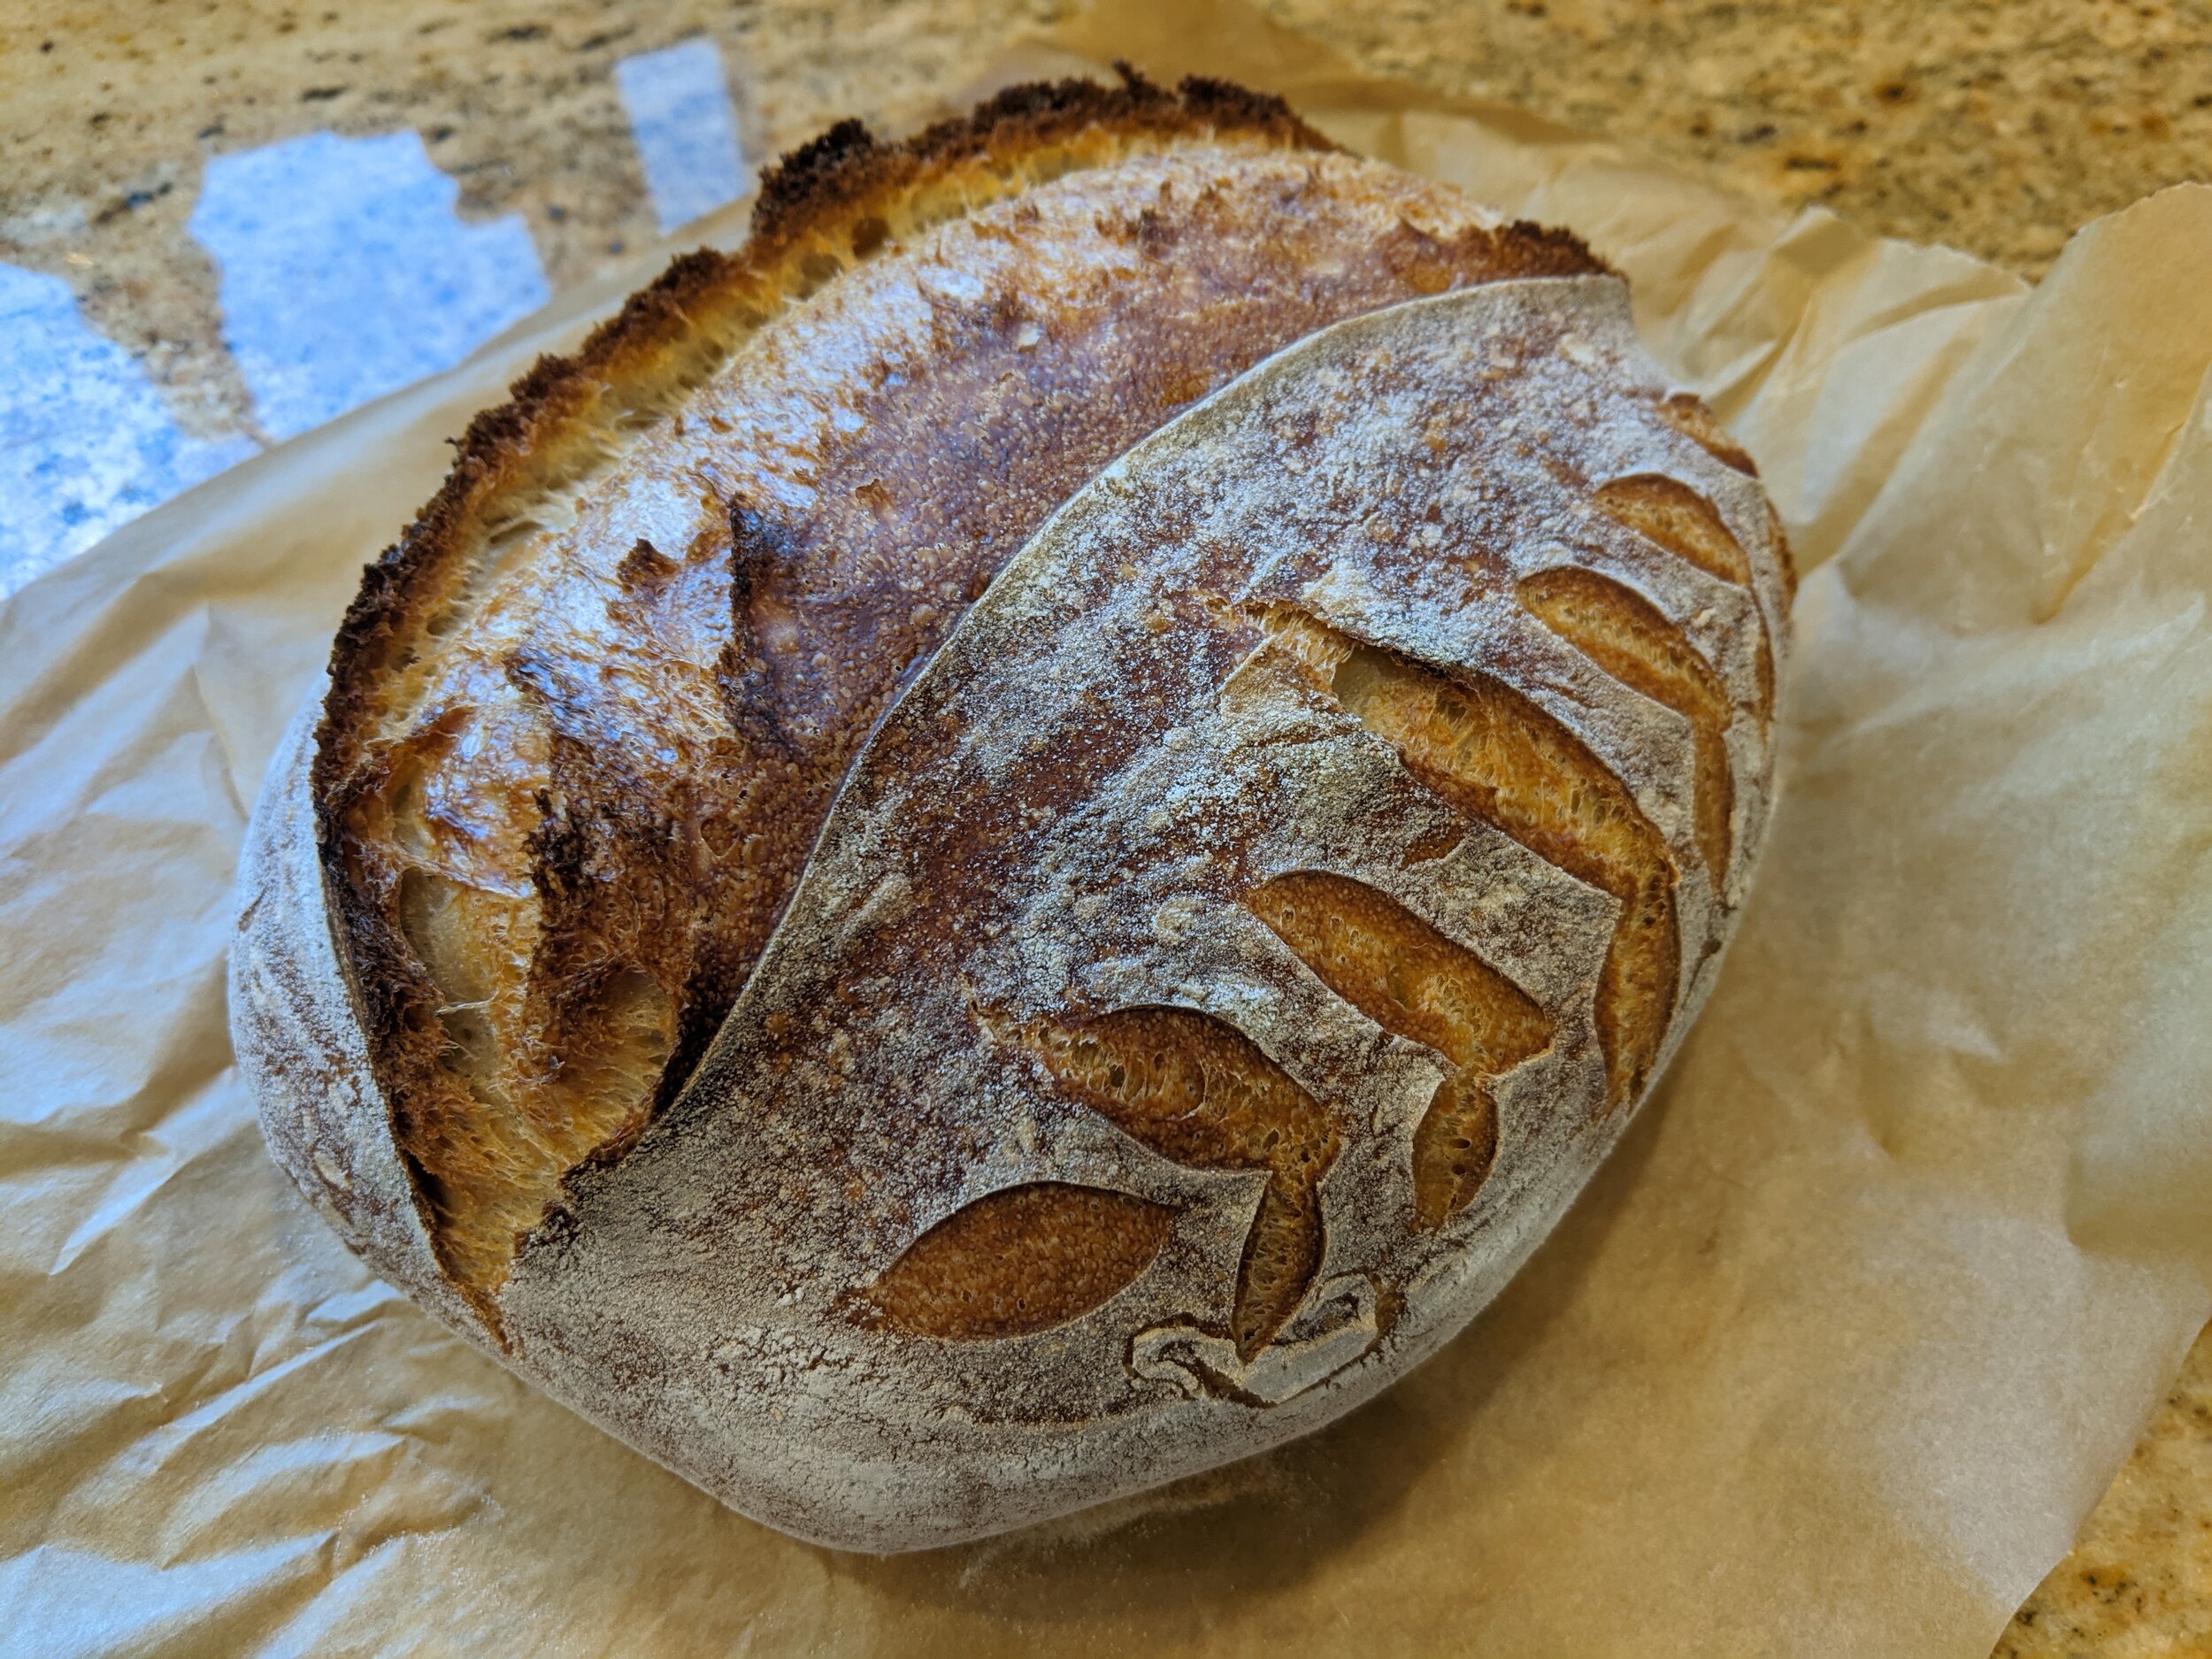
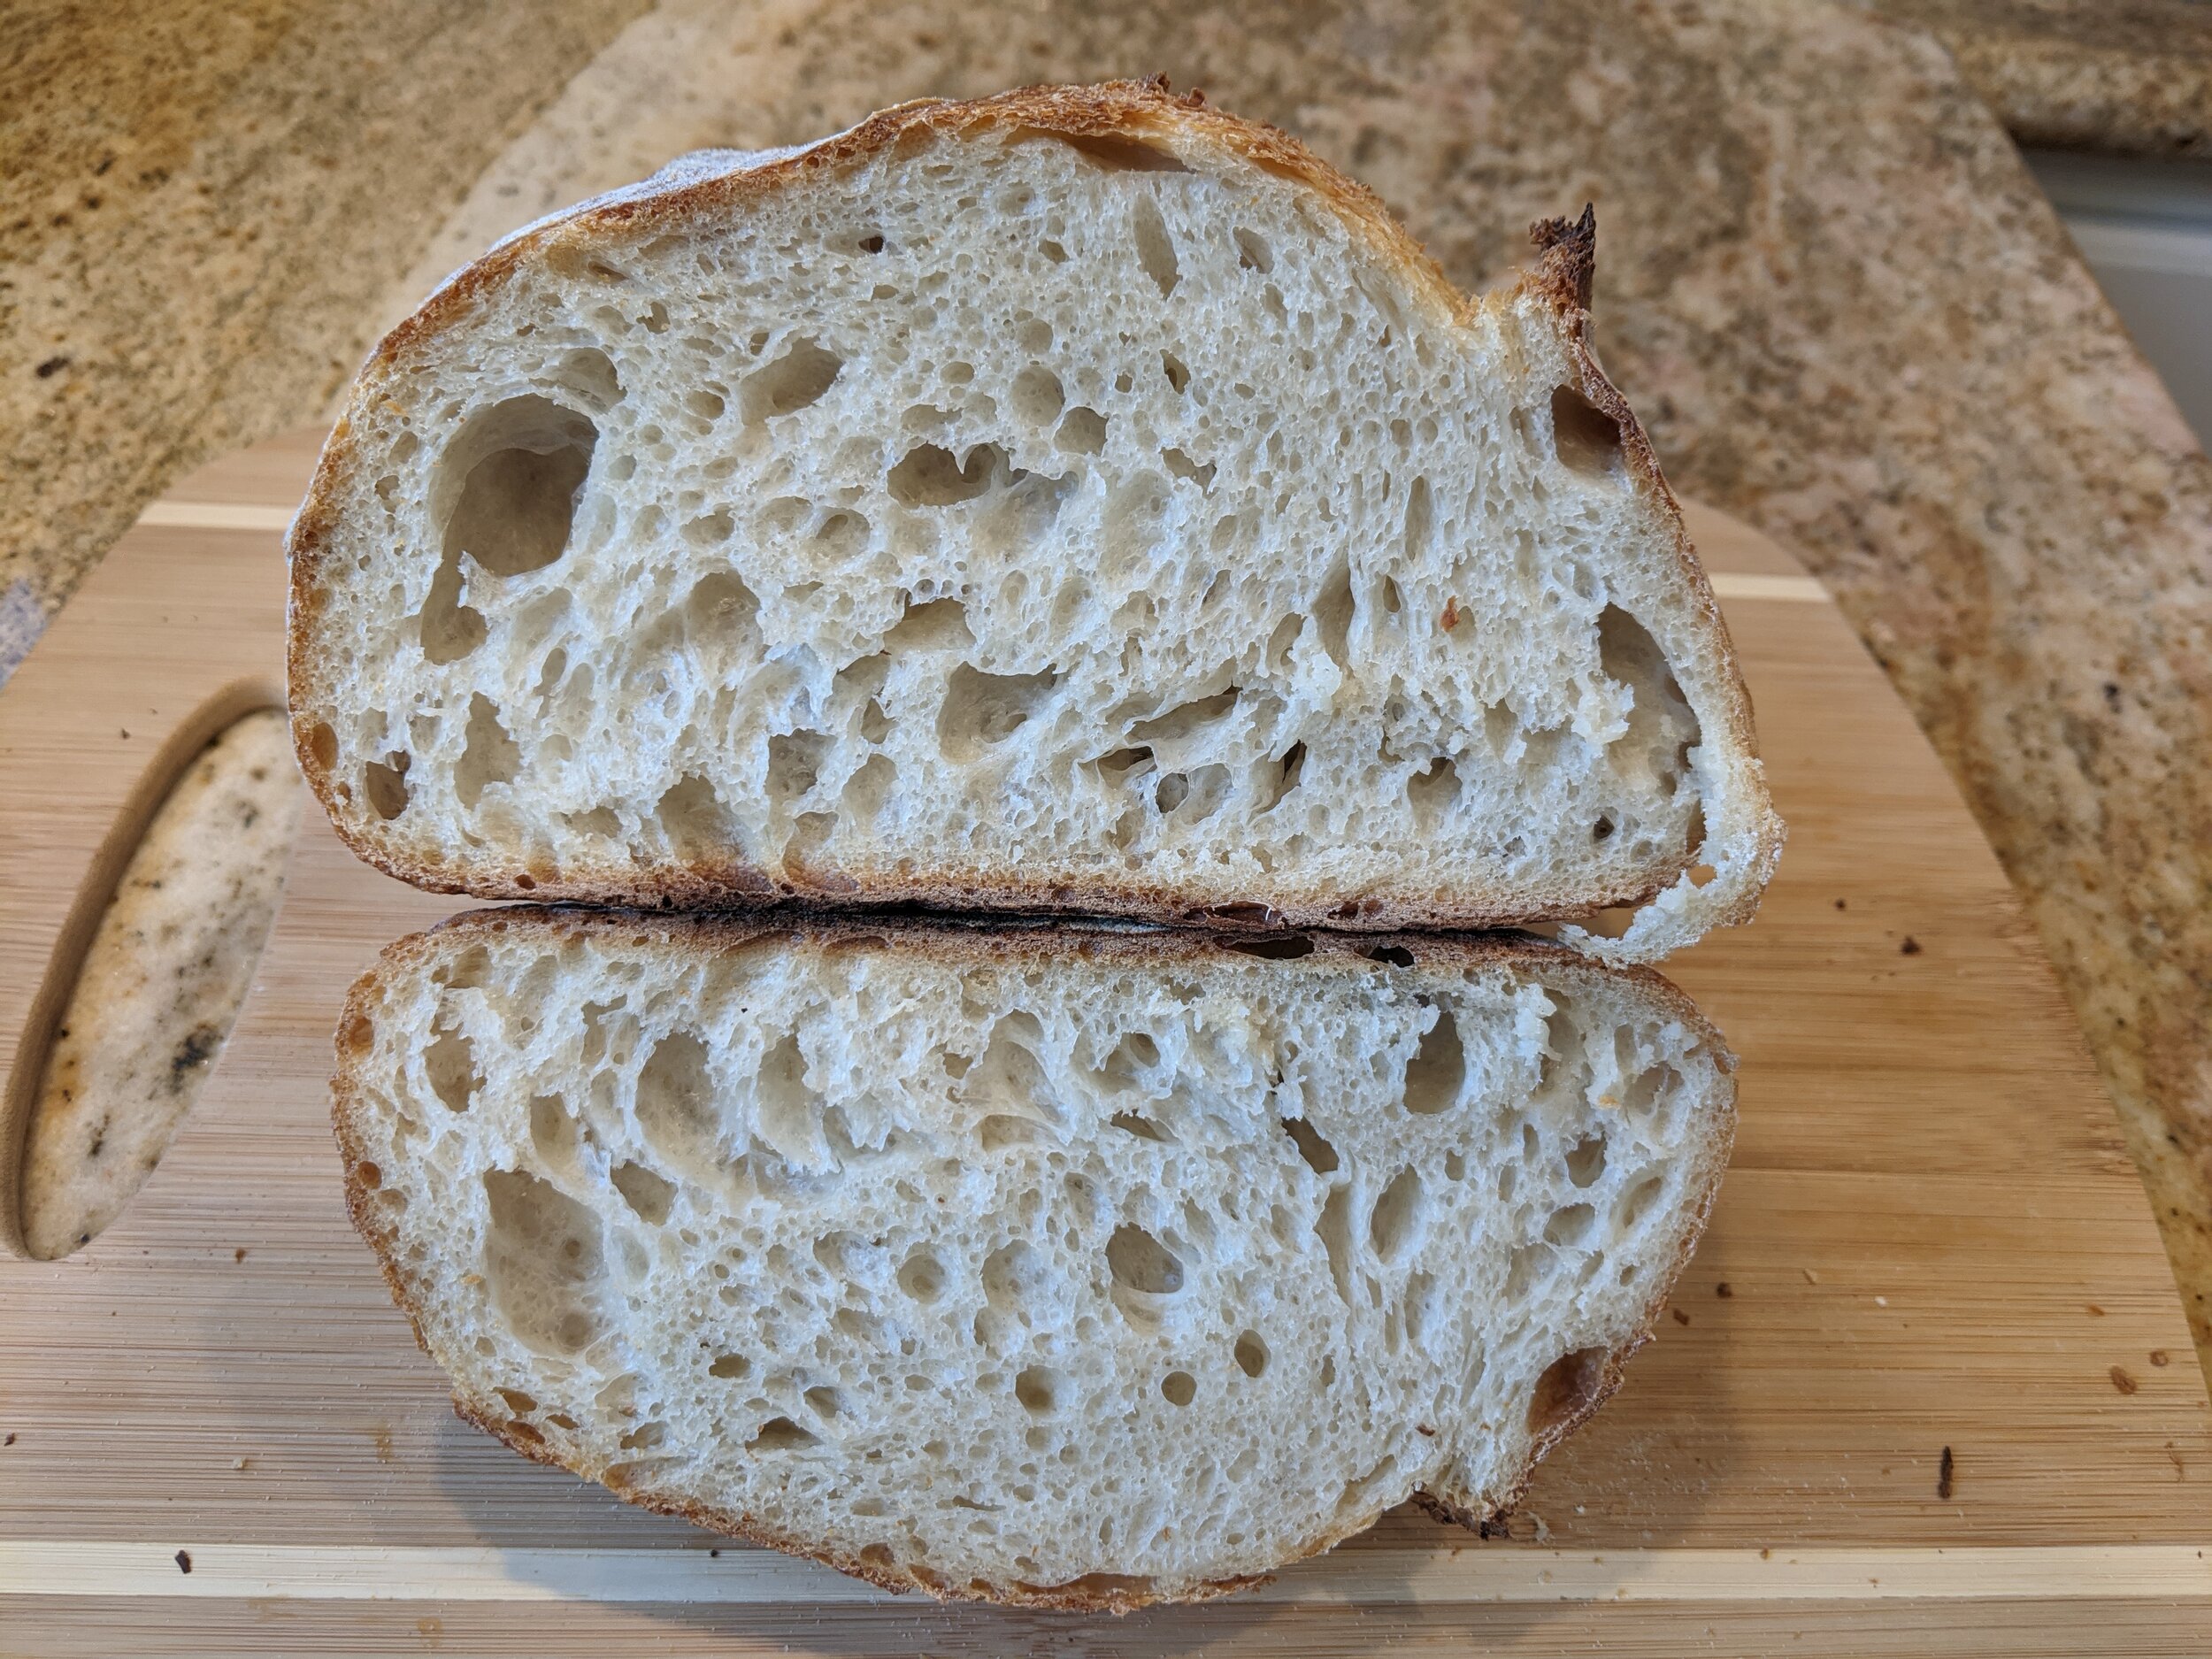
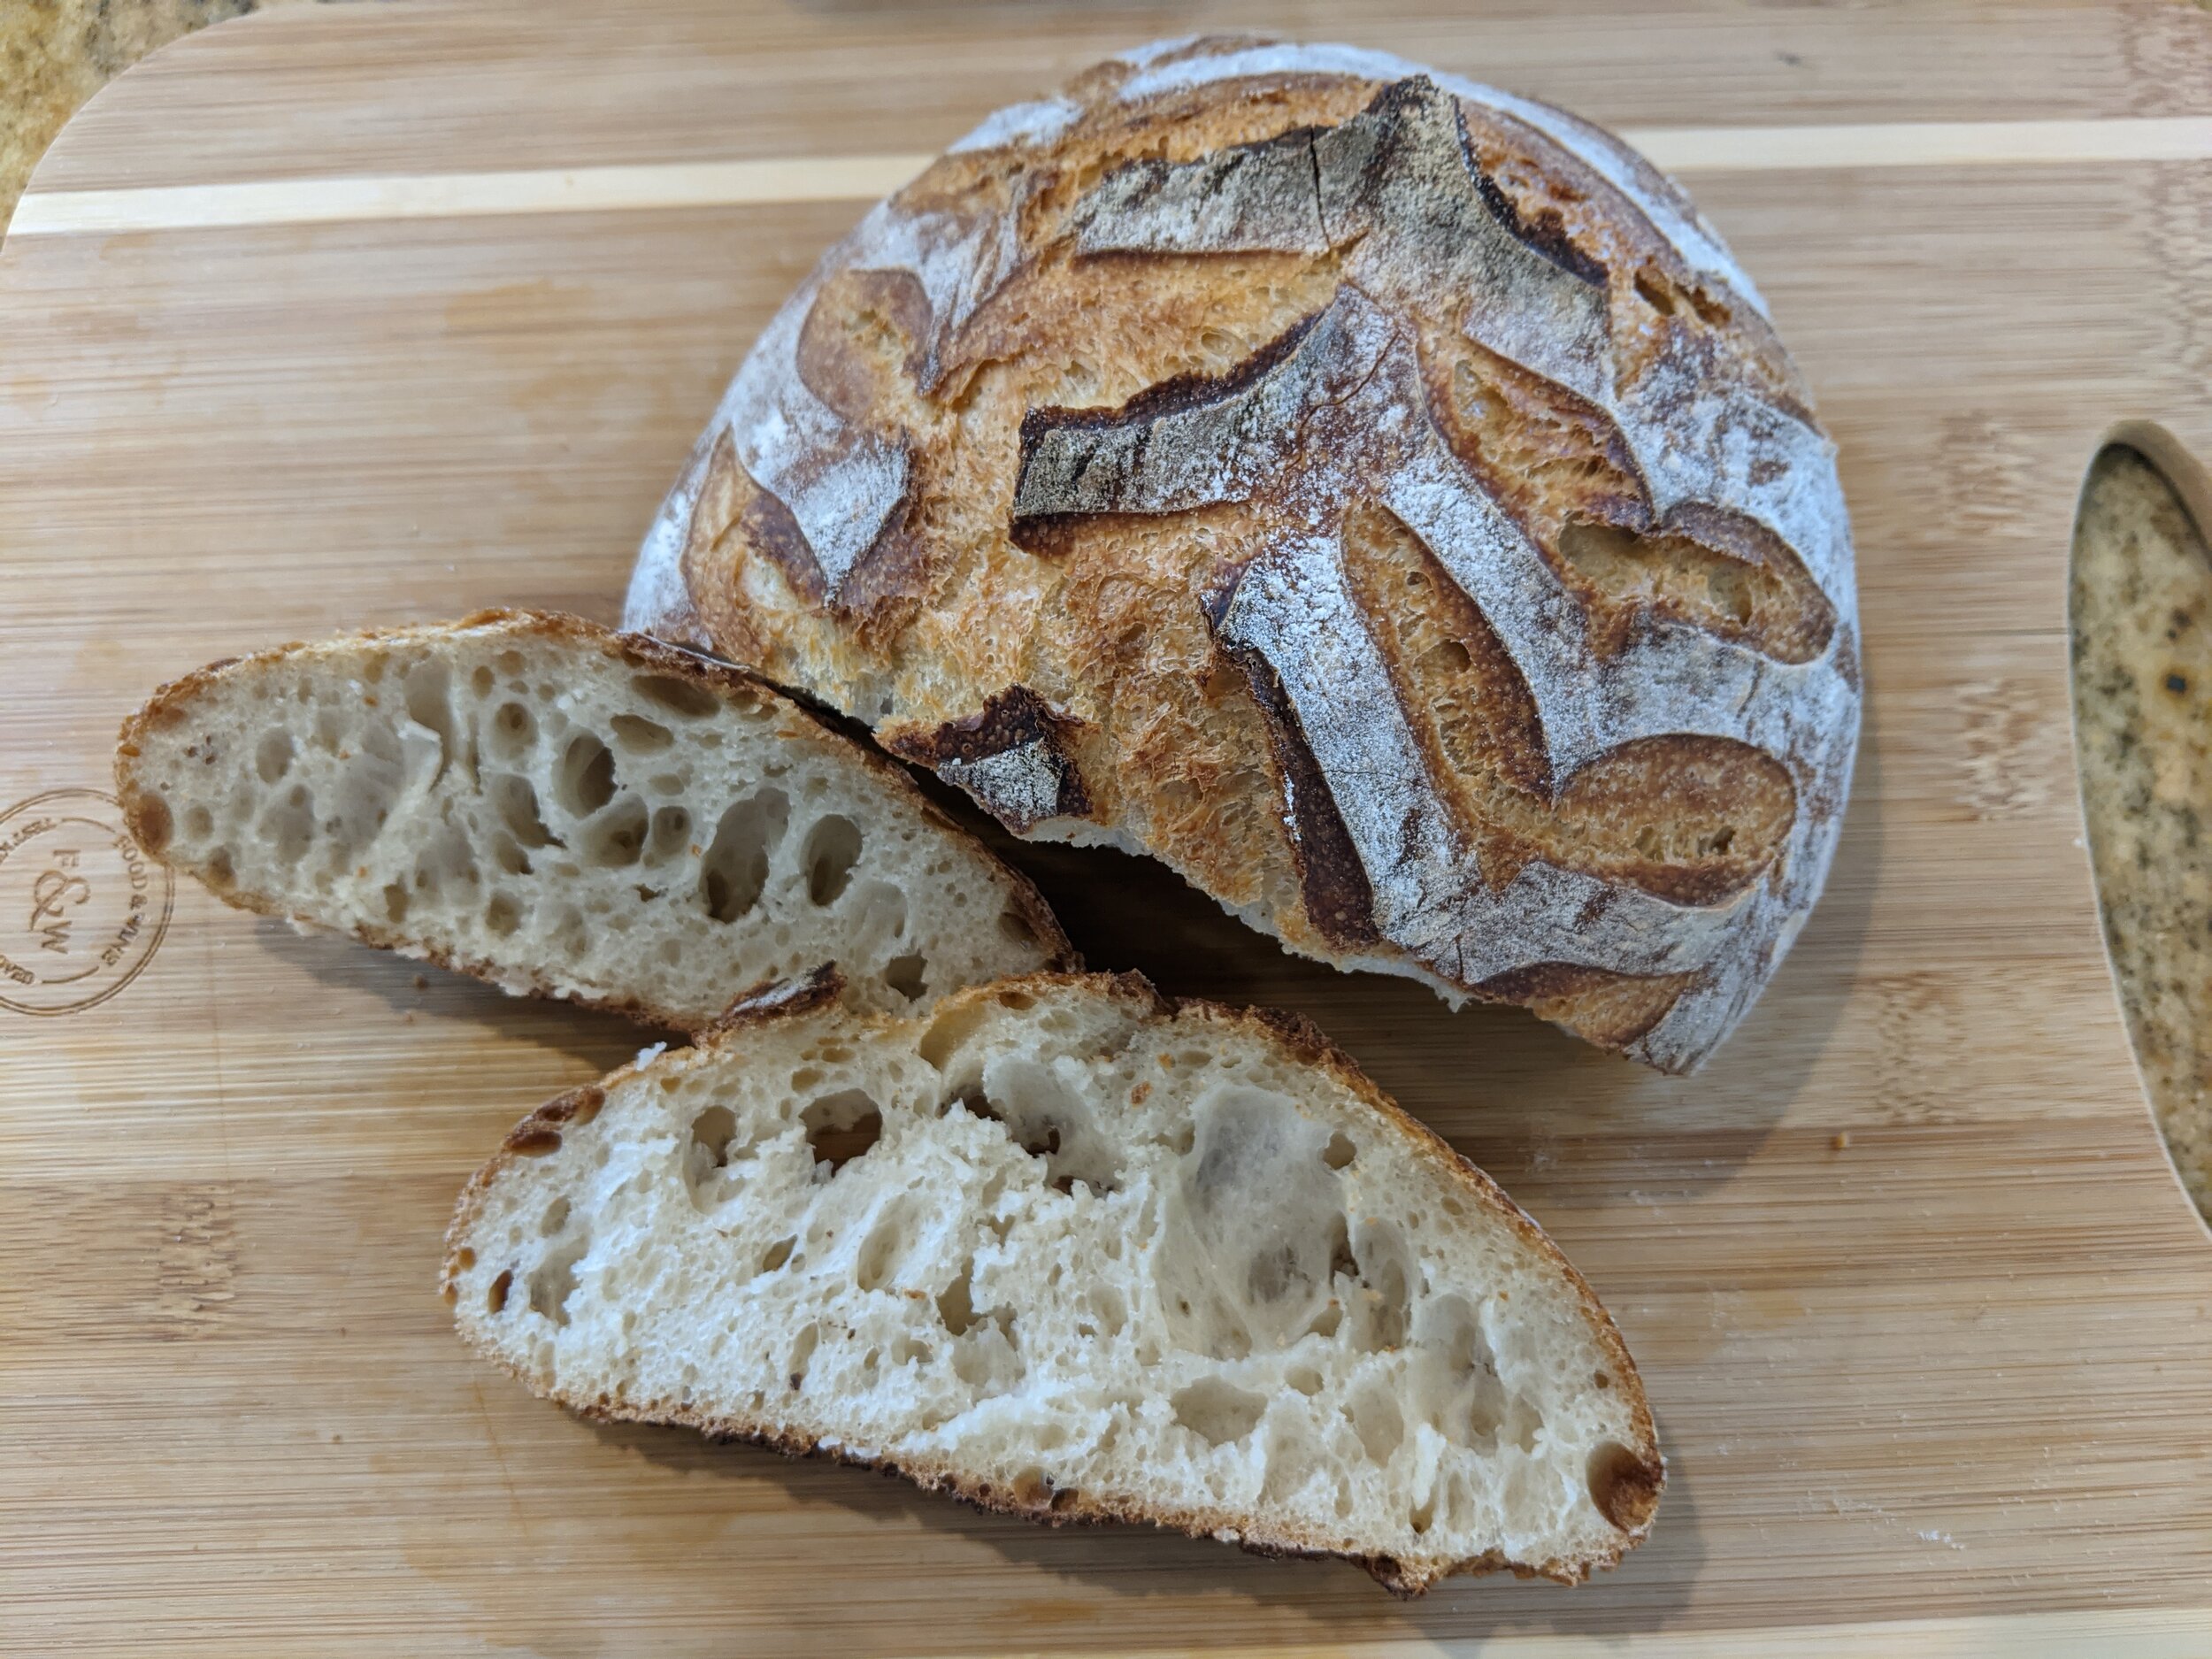
Below is the recipe based on my first sourdough loaf which I was thrilled turned out so well and delicious with moist, chewy crumb with holes (crumb is the texture of the inside of the loaf.) I’ve been able to replicate this recipe a few times, which is largely based on the video below, so now I’m sharing with you.
Sourdough Starter
I feed my starter (which I leave in the refrigerator except the day before feeding it to make it active at room temperature for baking) 1:1:1 ratios of starter : all purpose flour : water in weight (not in volume) about once a week. Your starter will not die if you don’t feed it a few weeks. A once a week schedule is easy to remember. Unless you are using your starter for other baking, you will need to discard some starter first or you will end up with way too much starter. The book will teach you more about starter.
Watch This Video
This is the video of the method I followed for my first successful loaf, “15 Mistakes Most Beginner Sourdough Bakers Make”: https://www.youtube.com/watch?v=BJEHsvW2J6M
Here are his instructions: https://www.prohomecooks.com/post/15-mistakes-for-sourdough
You might download his pdf checklists (I roughly follow his Flex Bake): https://www.sourdoughu.com/4-sourdough-recipes
Sourdough Bread Ingredients (makes 1 large loaf)
500 grams bread flour (bread flour has >12% protein for better gluten structure and holding hydration, I use either King Arthur or Whole Foods organic bread flour)
375 grams water (75% hydration)
80 grams (15%) sourdough starter (I’ve used as much as 100 grams (20%) starter, more starter shortens the bulk rise time)
9 grams fine grain salt (it should be fine grain so it dissolves easily)
Sourdough Bread Method
Day 1, first thing in the morning (ideally by 8:30am)
Leave starter out the night before so will be at room temperature in the morning.
First thing in the morning on Day 1, feed starter 1:1:1 ratios of starter : all purpose flour : water in weight (not in volume). Use a kitchen scale to do this. Cover the starter with a towel.
Put a rubber band around the jar to see that it rises at least double in size so is active for use. It should have bubbles and roasted marshmallow consistency. Besides the starter doubling in size, the other way to see if it is active and ready for use is drop a dollop of starter in water and see if it floats (make sure you don't crush the bubbles first, though.)
Day 1, when starter is active (4-8 hours after feeding in the morning, time depends on your starter)
Mix bread flour and water only with a fork, then let rest for 60 minutes of autolyse. The dough will go from wet and shaggy to having more tension (gluten structure.)
Add 80 g starter and 9 g salt, stretch and fold until all mixed (see video). Let it rest in bowl 30 minutes.
Stretch and fold every 30 minutes for the 2 to 2.5 hours (4 or 5 stretch and folds) until dough has a nice gluten structure. After the last stretch and fold, stretch a small section into a very thin, translucent "window pane" in the dough, the dough shouldn't rip apart (meaning the gluten structure is strong enough).
Let it bulk rise in the bowl for 3 to 6 hours at room temperature (72 to 82 degrees Fahrenheit) until it rises at least 30% up to 50%. Use your intuition based on % of rise (not time). This bulk fermentation builds the flavor.
Coax it from the bowl onto a lightly floured surface, pre-shape into a round or oval with a gentle stretch and fold. Be very gentle in this stretch and fold because you don’t want to lose the air and volume from bulk rise.
Let it rest 30 minutes on the flat surface ("bench rest").
Do a very gentle stretch and fold shaping it into a round (if a round Banneton) or very gentle stretch and fold of the left and right sides towards the center and then roll up from the bottom side like a sausage (if an oval Banneton). Pinch shut any gaps, seams. Apply some flour to the outside to help it not stick to the Banneton.
Heavily flour with rice flour (rice flour provides less stickiness than all-purpose flour so the dough will slip easily out) the Banneton's linen liner and discard the extra flour. Use the pastry scraper to help lift it and place it into a Banneton proofing basket with the seam side up.
Wrap the Banneton in plastic wrap (or large plastic bag) to retain moisture, and put in the fridge overnight to "proof" for 12-20 hours. This enhances the flavor because the bacteria keep creating flavor in the refrigerator.
Day 2, morning
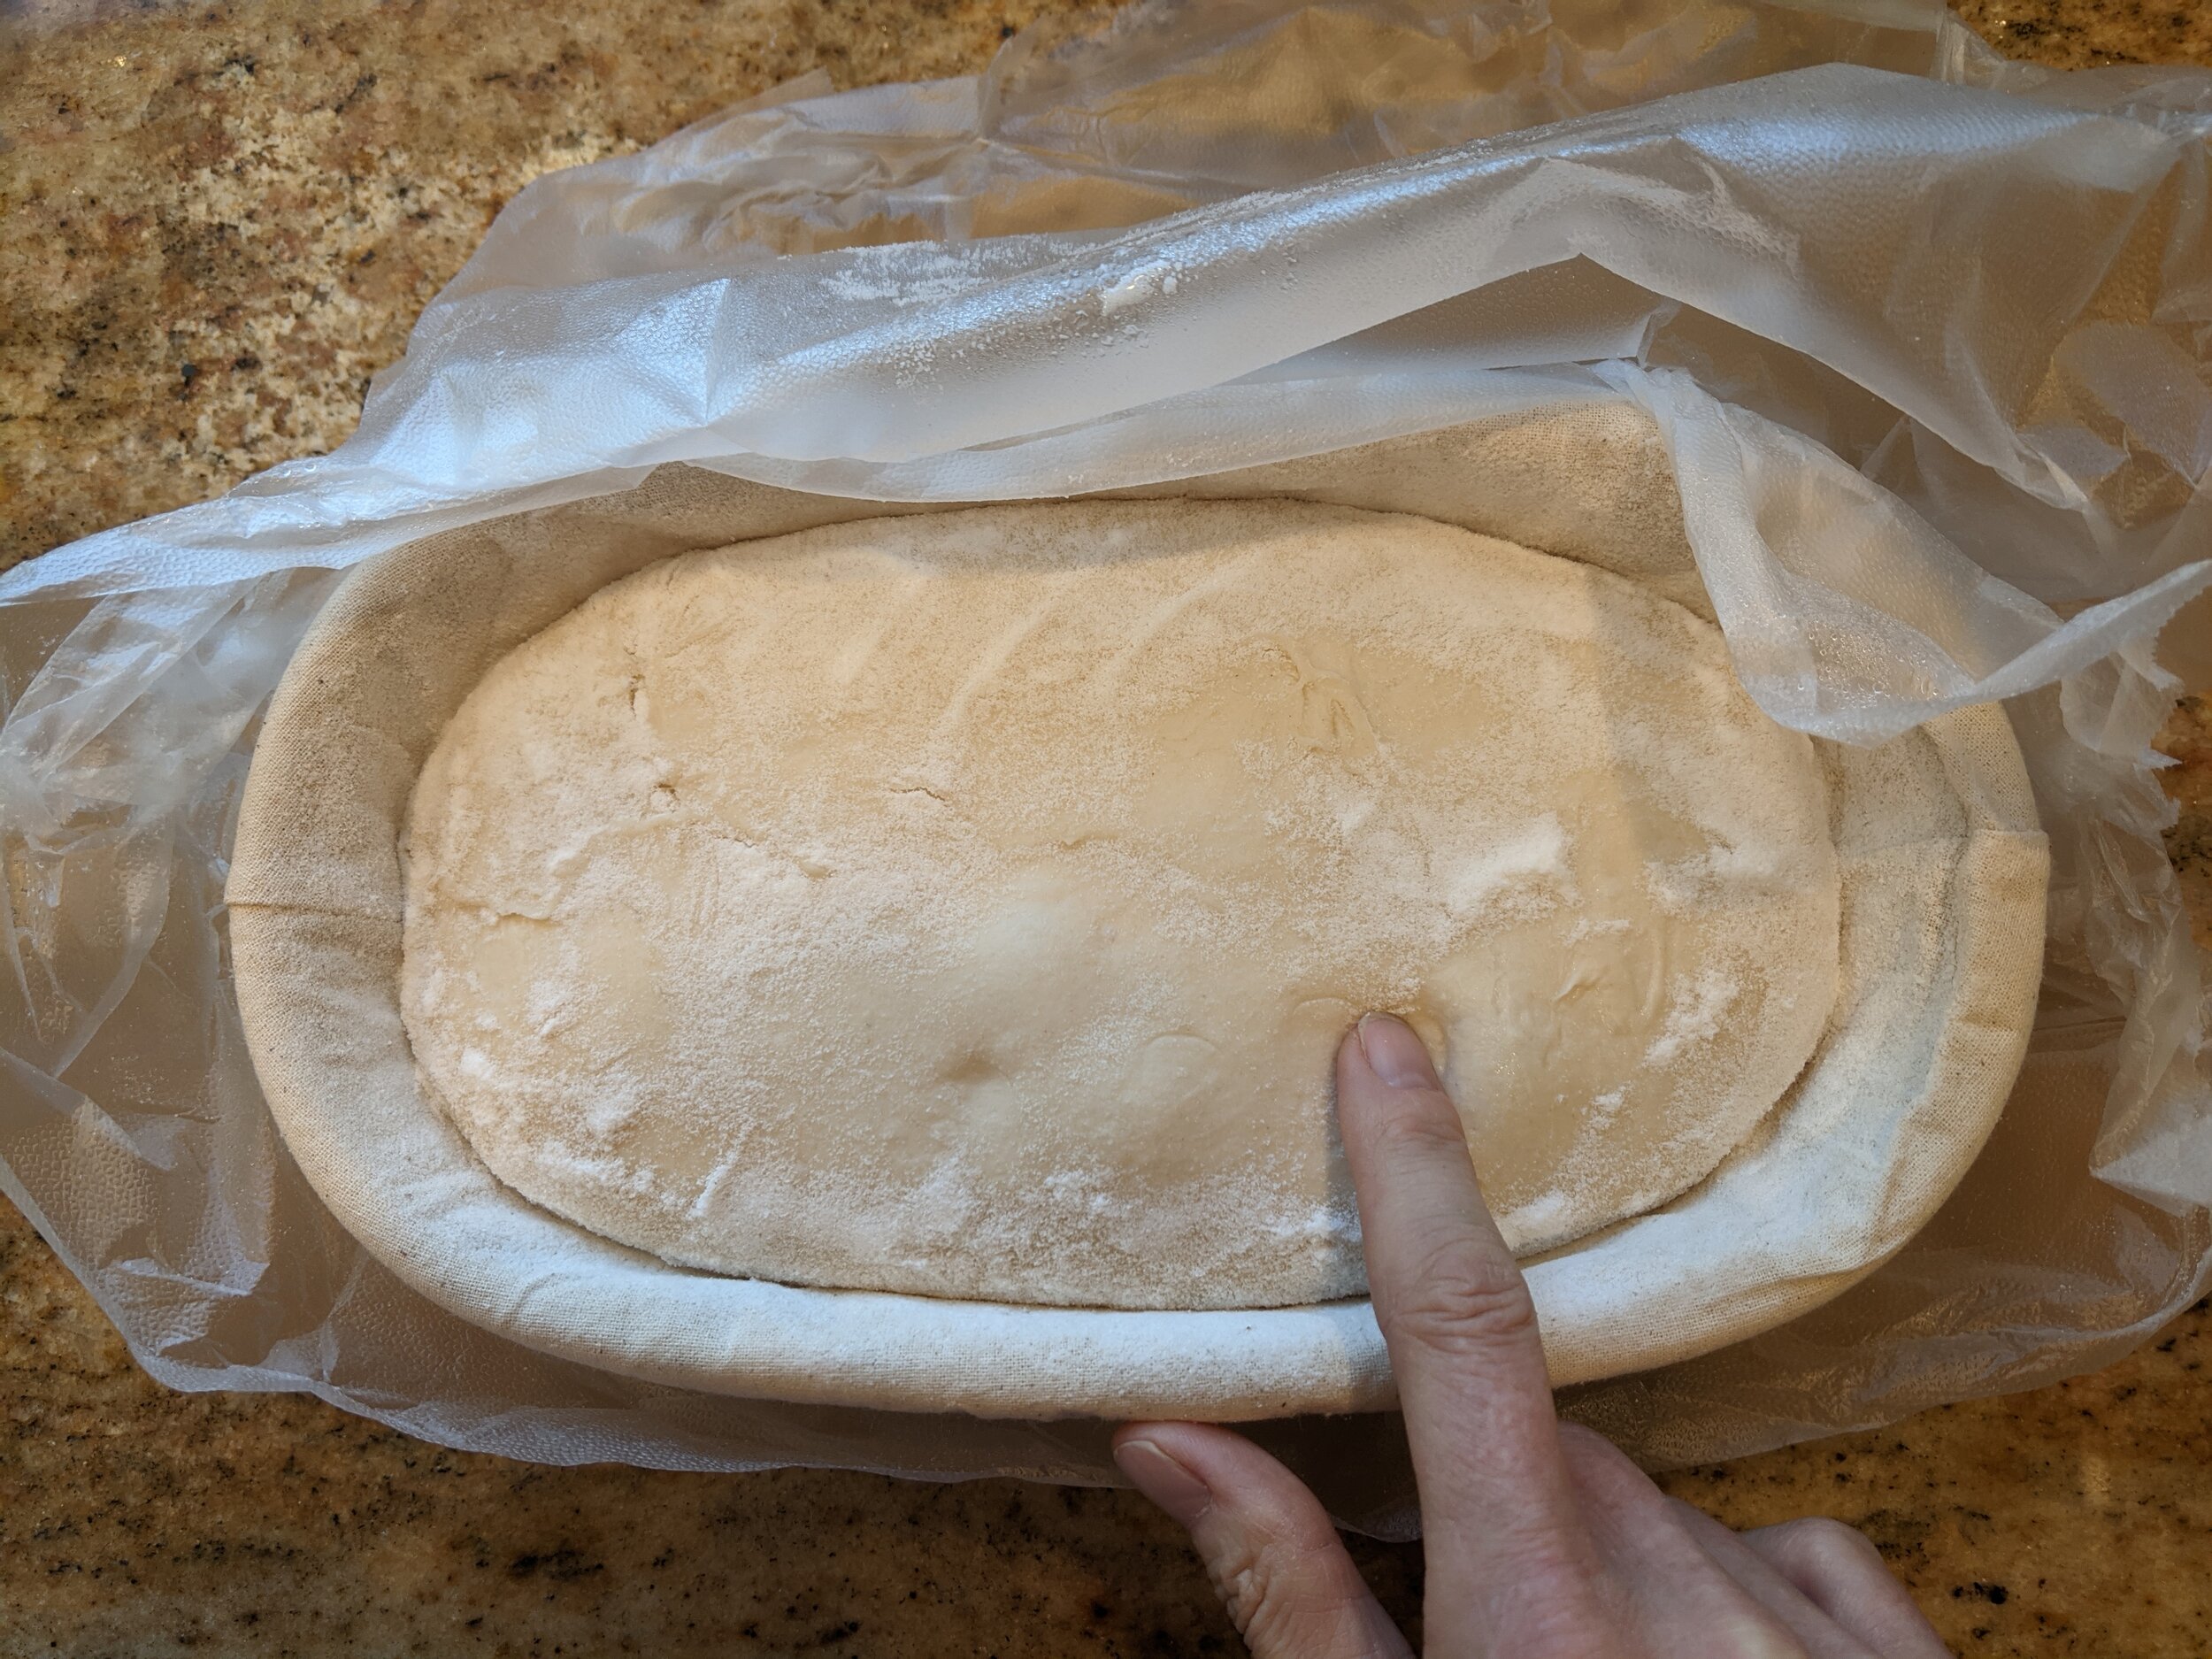
In the morning, pull it out of the fridge. It should pass the poke text of just a little depression after a gentle poke. If a poke springs back all the way with no little depression, then it needs more time proofing. If a poke test leaves a big dent, then it spent too much time proofing. Also, the dough should be holding its shape nicely.
Preheat oven to 500 degrees and then preheat the dutch oven at 500 degrees for at least 45 minutes.
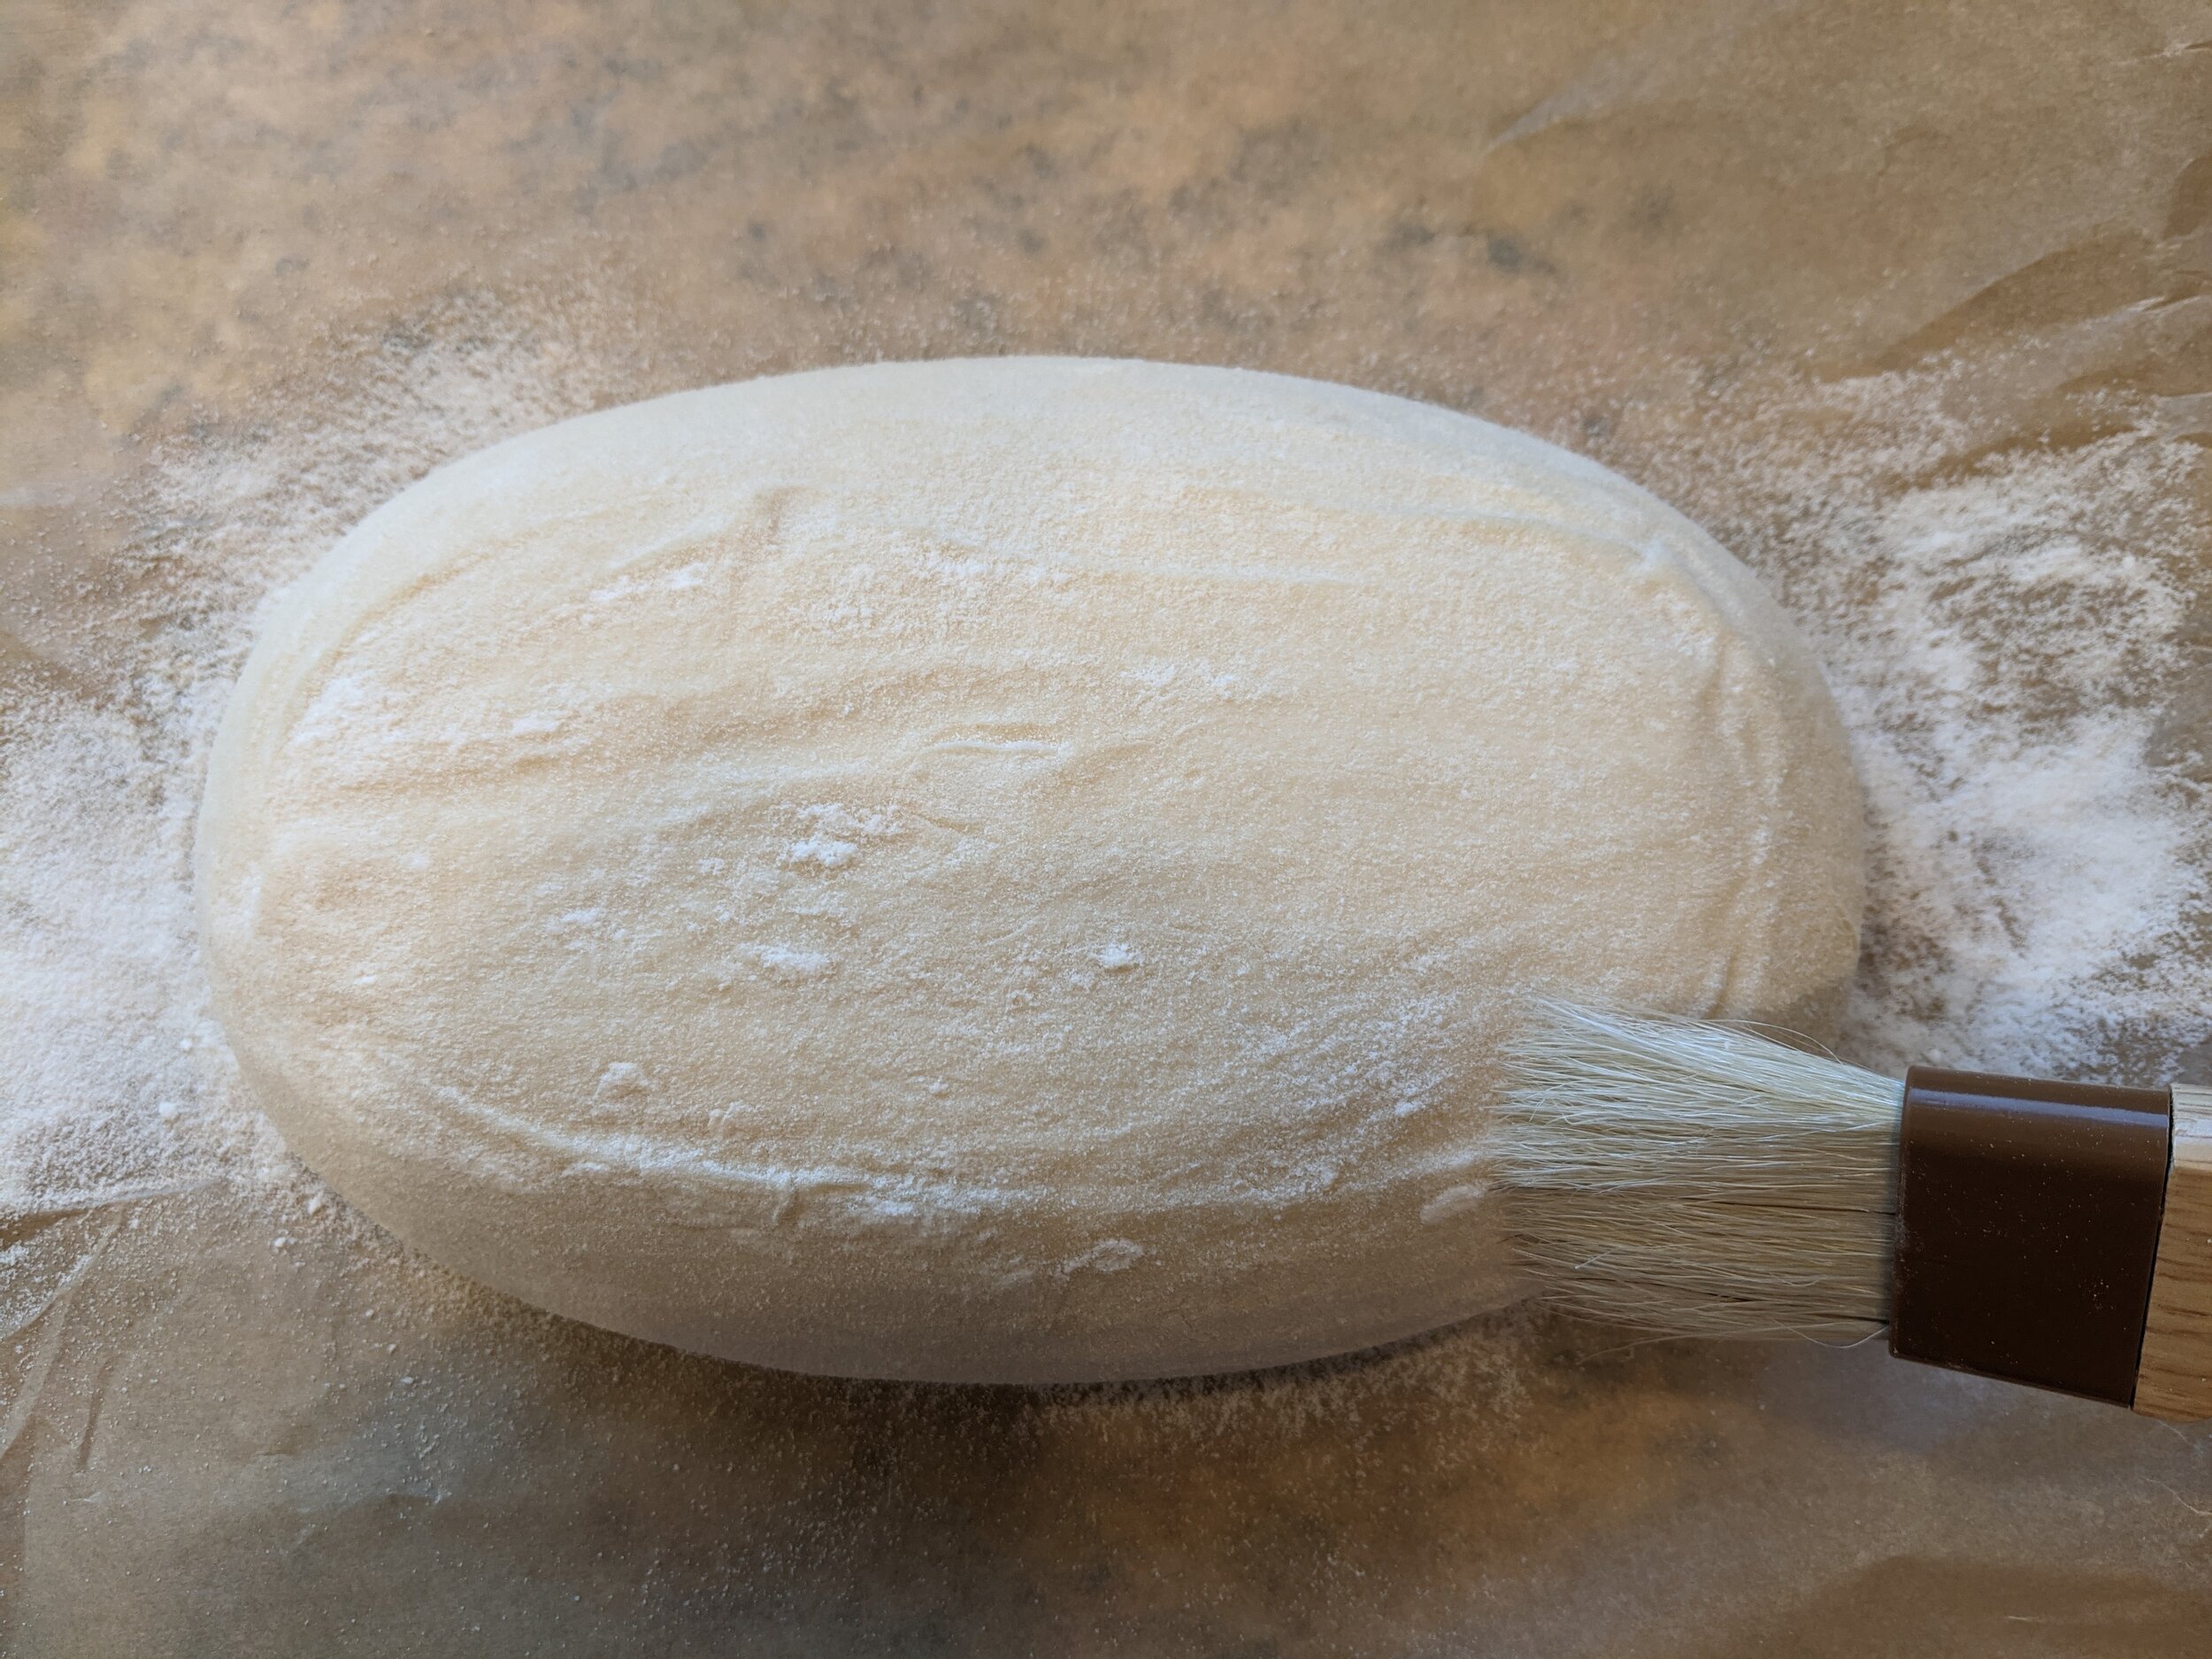
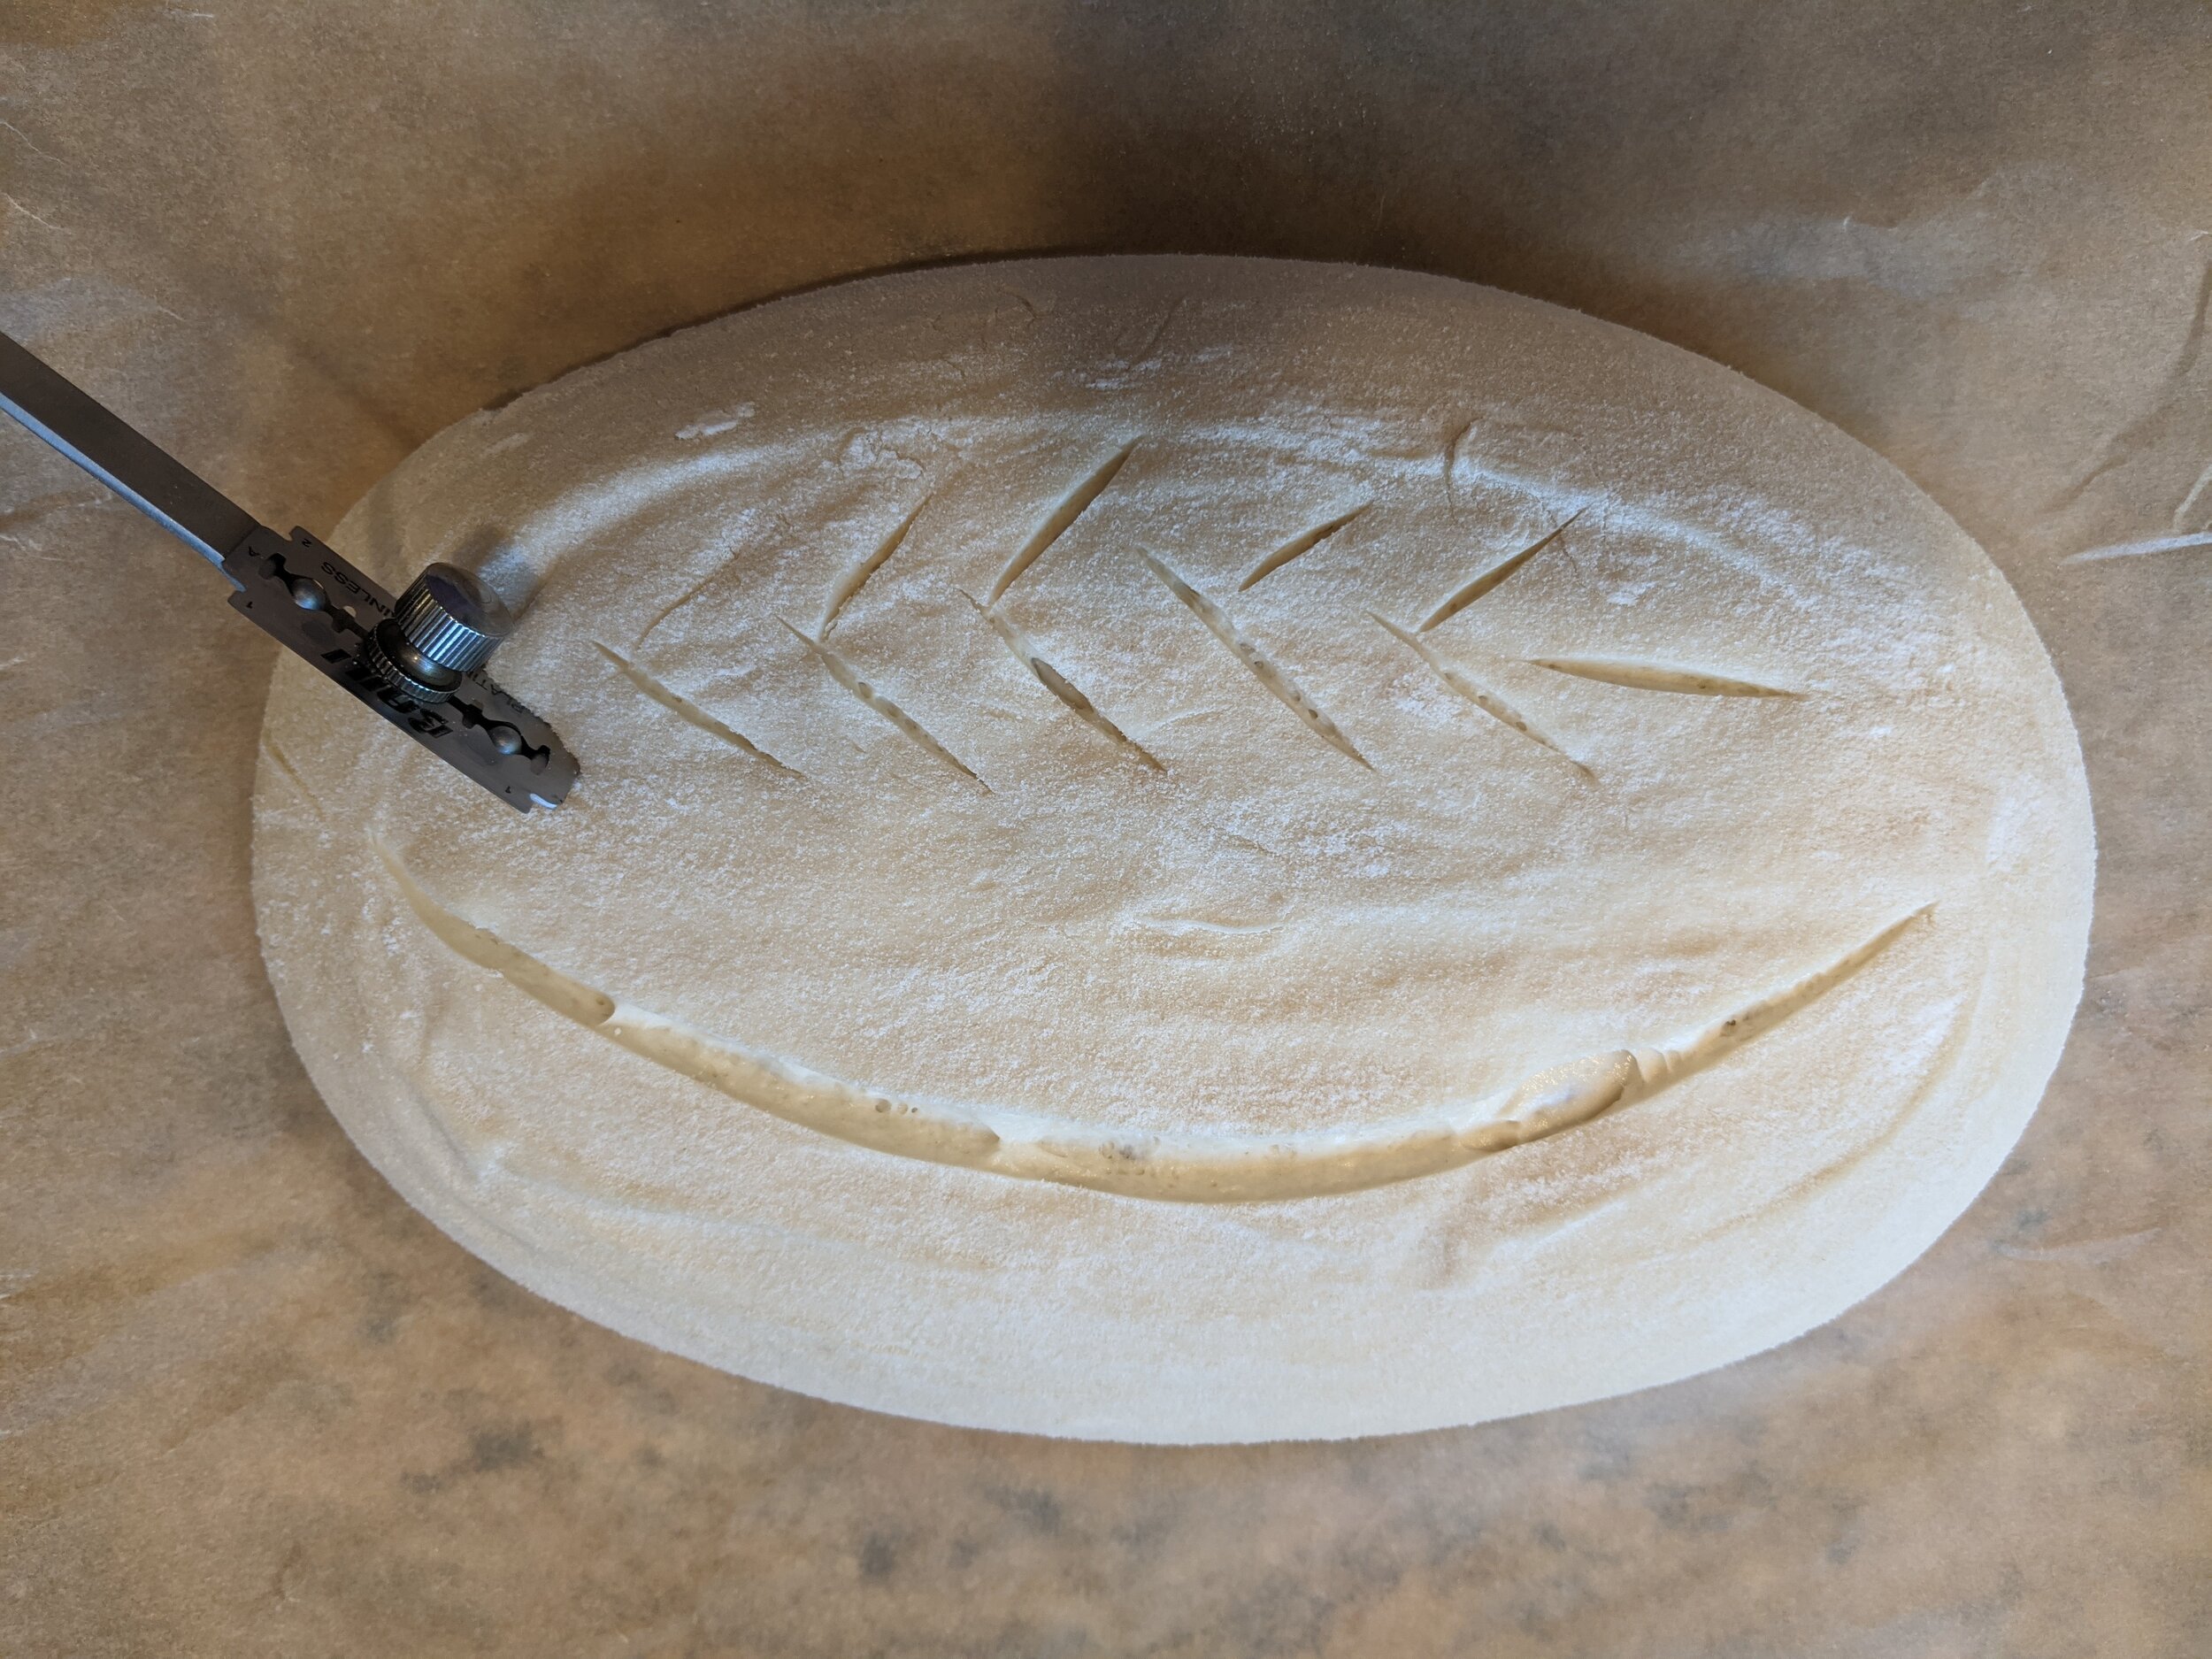
While dutch oven is heating, put a sheet of parchment paper over the Banneton, turned it upside down so the dough falls gently onto the parchment paper. Use a pastry brush to brush off the excess flour. Then score with a razor blade (the book has various patterns on page 195), and lift the parchment paper and dough and place it in the hot dutch oven.
Bake it at 500 degrees for 20 minutes with the lid on.
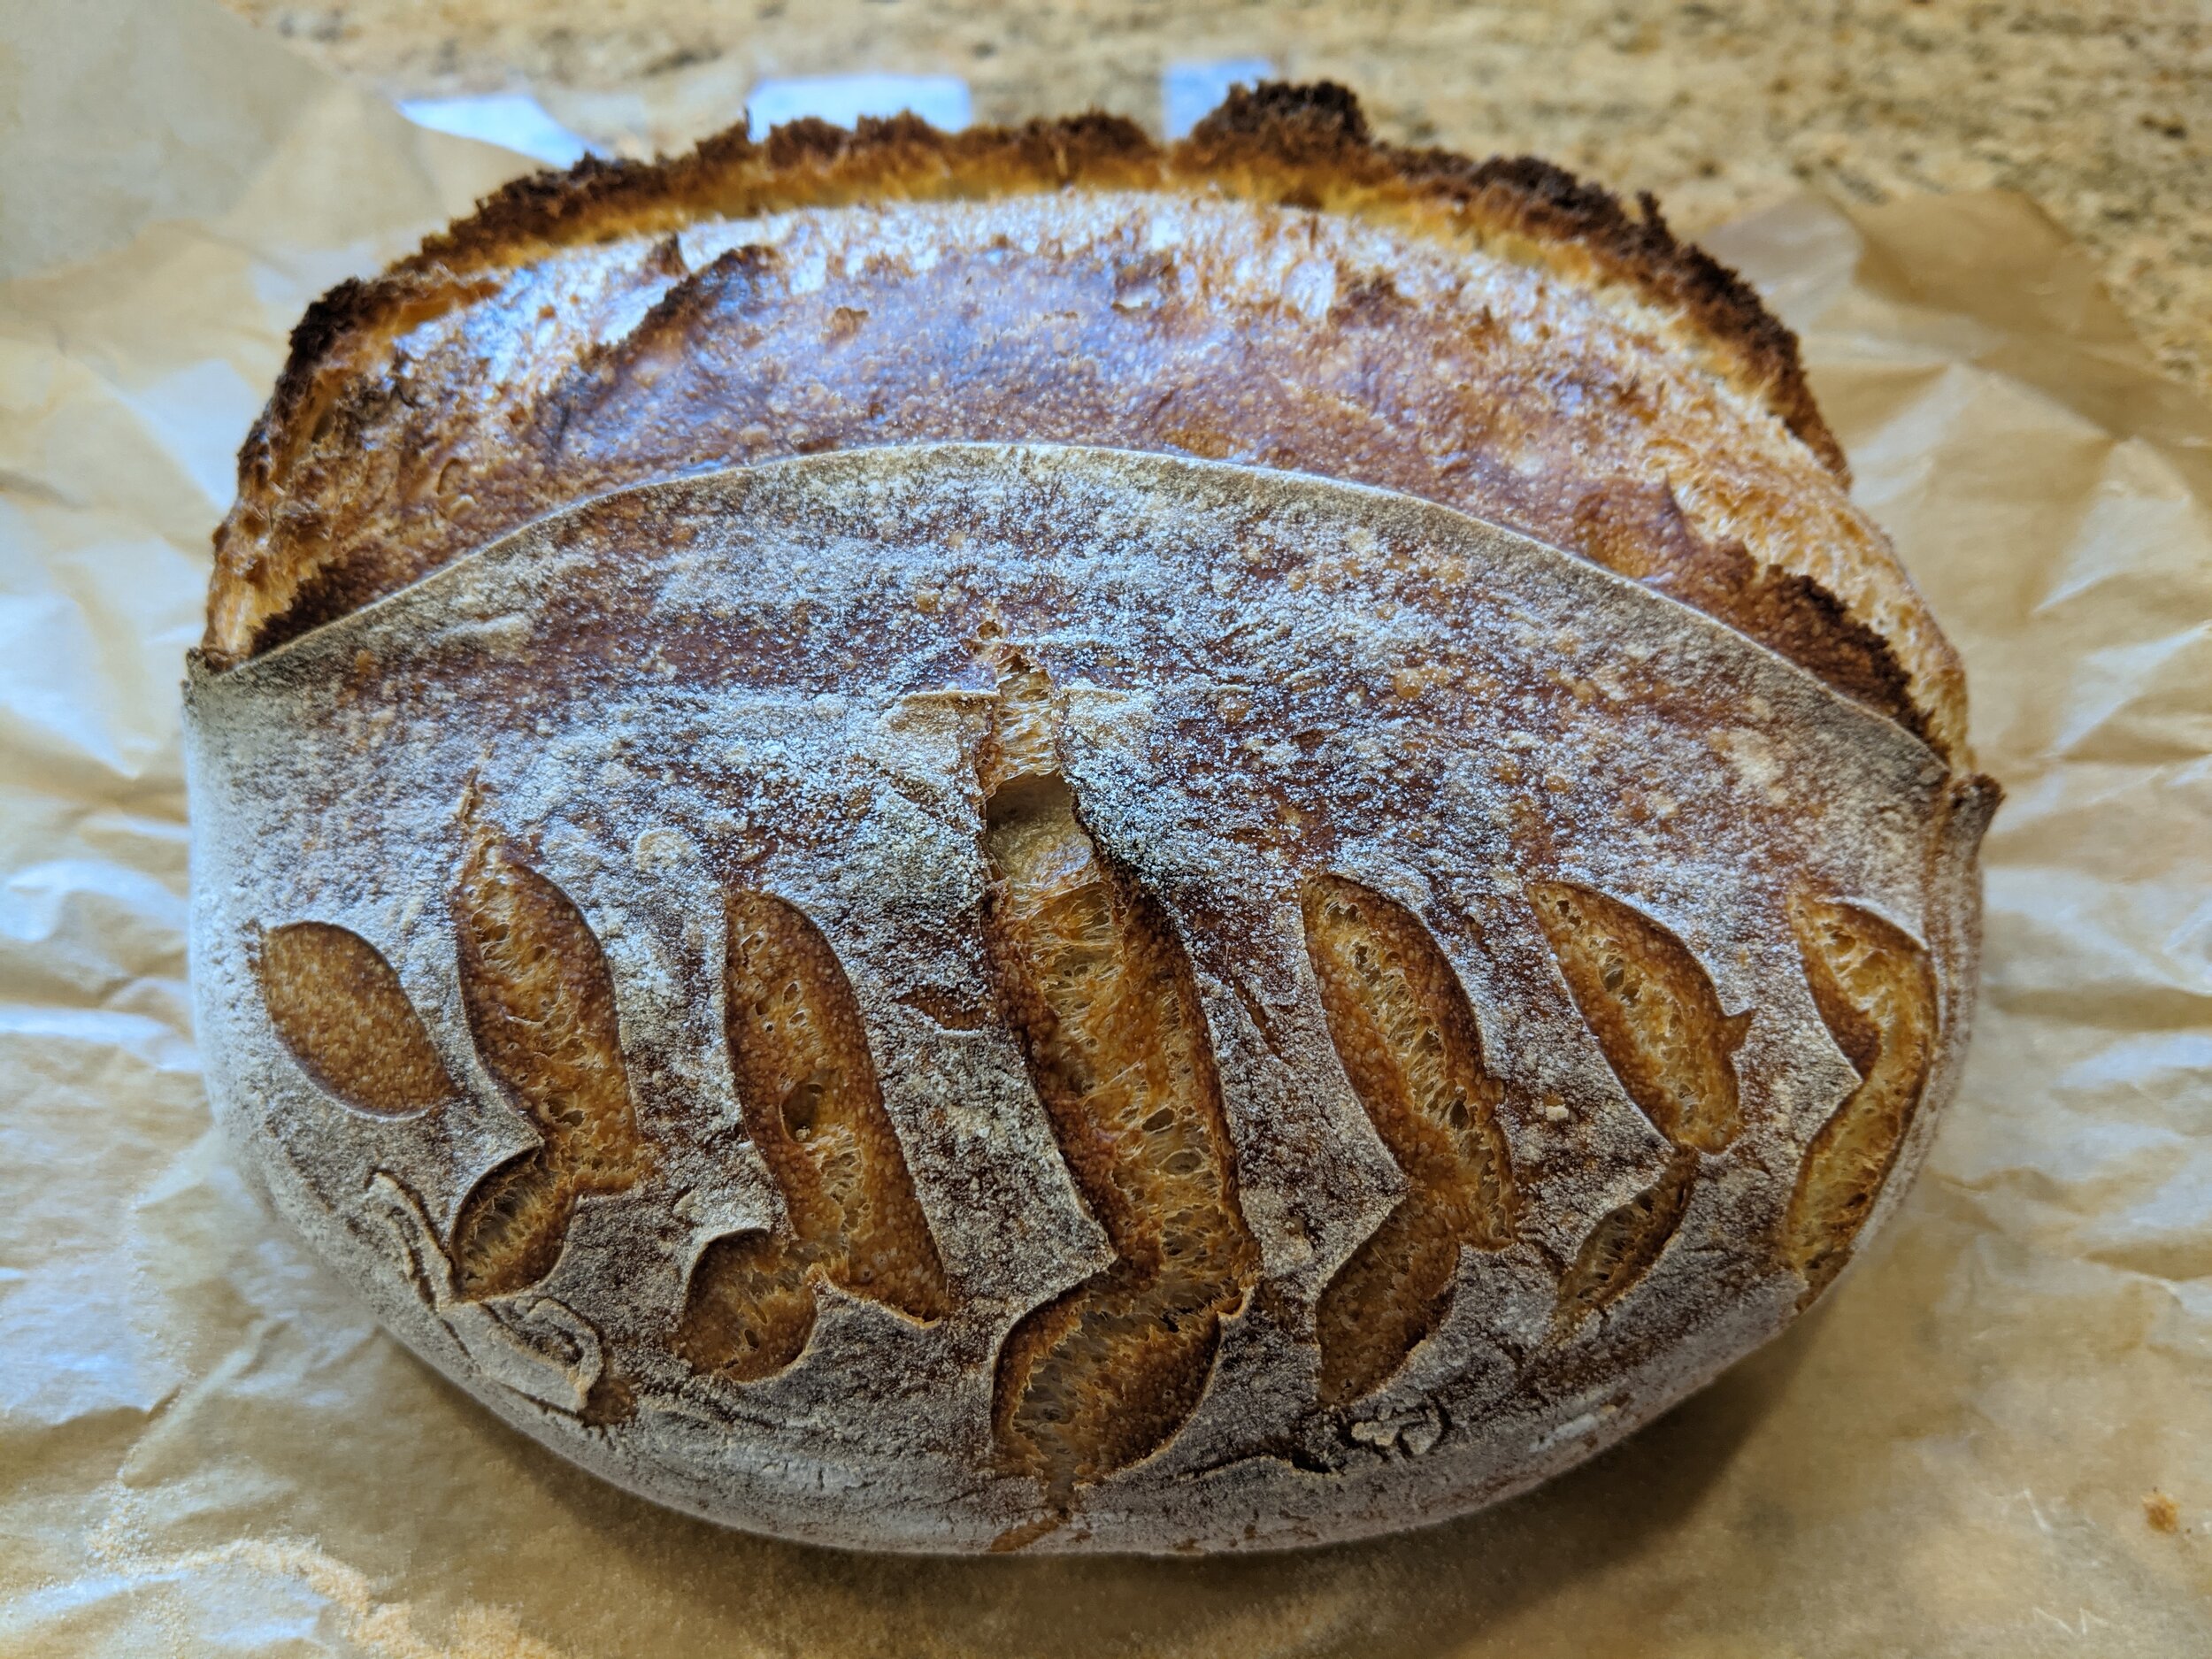
Turn the oven down to 450 degrees, remove the lid of the dutch oven, place the dutch oven on a baking tray (to prevent bottom of crust from burning), and bake it 20 to 30 more minutes, depending on the color of the bread, not too light colored but deep brown.
Remove the loaf from the dutch oven and let it cool for at least one hour because it’s still baking until it cools (waiting to eat is the hardest part!) The result has the crumb with hydration holes and a moist, chewy texture.
KITCHEN Tools you will need
These are the kitchen tools I bought (as recommended by my friends and others I found):
Moderate-sized canister for storing and feeding the starter (1050 ML)
https://www.amazon.com/Storage-77L-Ceramic-Airtight-Bamboo/dp/B074Z7G289
or large canister for storing and feeding the starter (2430 ML)
https://www.amazon.com/dp/B07TDH3SL4
Kitchen scale
https://www.amazon.com/gp/product/B07Z59CDM8f
Pastry scraper
https://www.amazon.com/gp/product/B085W53QX6
9 inch round or 10 inch oval Banneton proofing basket
https://www.amazon.com/gp/product/B01GM4UZJI
7.5 qt (or thereabouts) dutch oven (traps steam when baking)
https://www.amazon.com/gp/product/B07B519FHC/
Bread lame / scoring utensil (you can also use a razor blade)
https://smile.amazon.com/gp/product/B079G7WC79/
Dough whisk (not necessary but helpful)
https://smile.amazon.com/dp/B086GCJKSH
Parchment paper (a couple options)